Build a VidaBox

Introduction

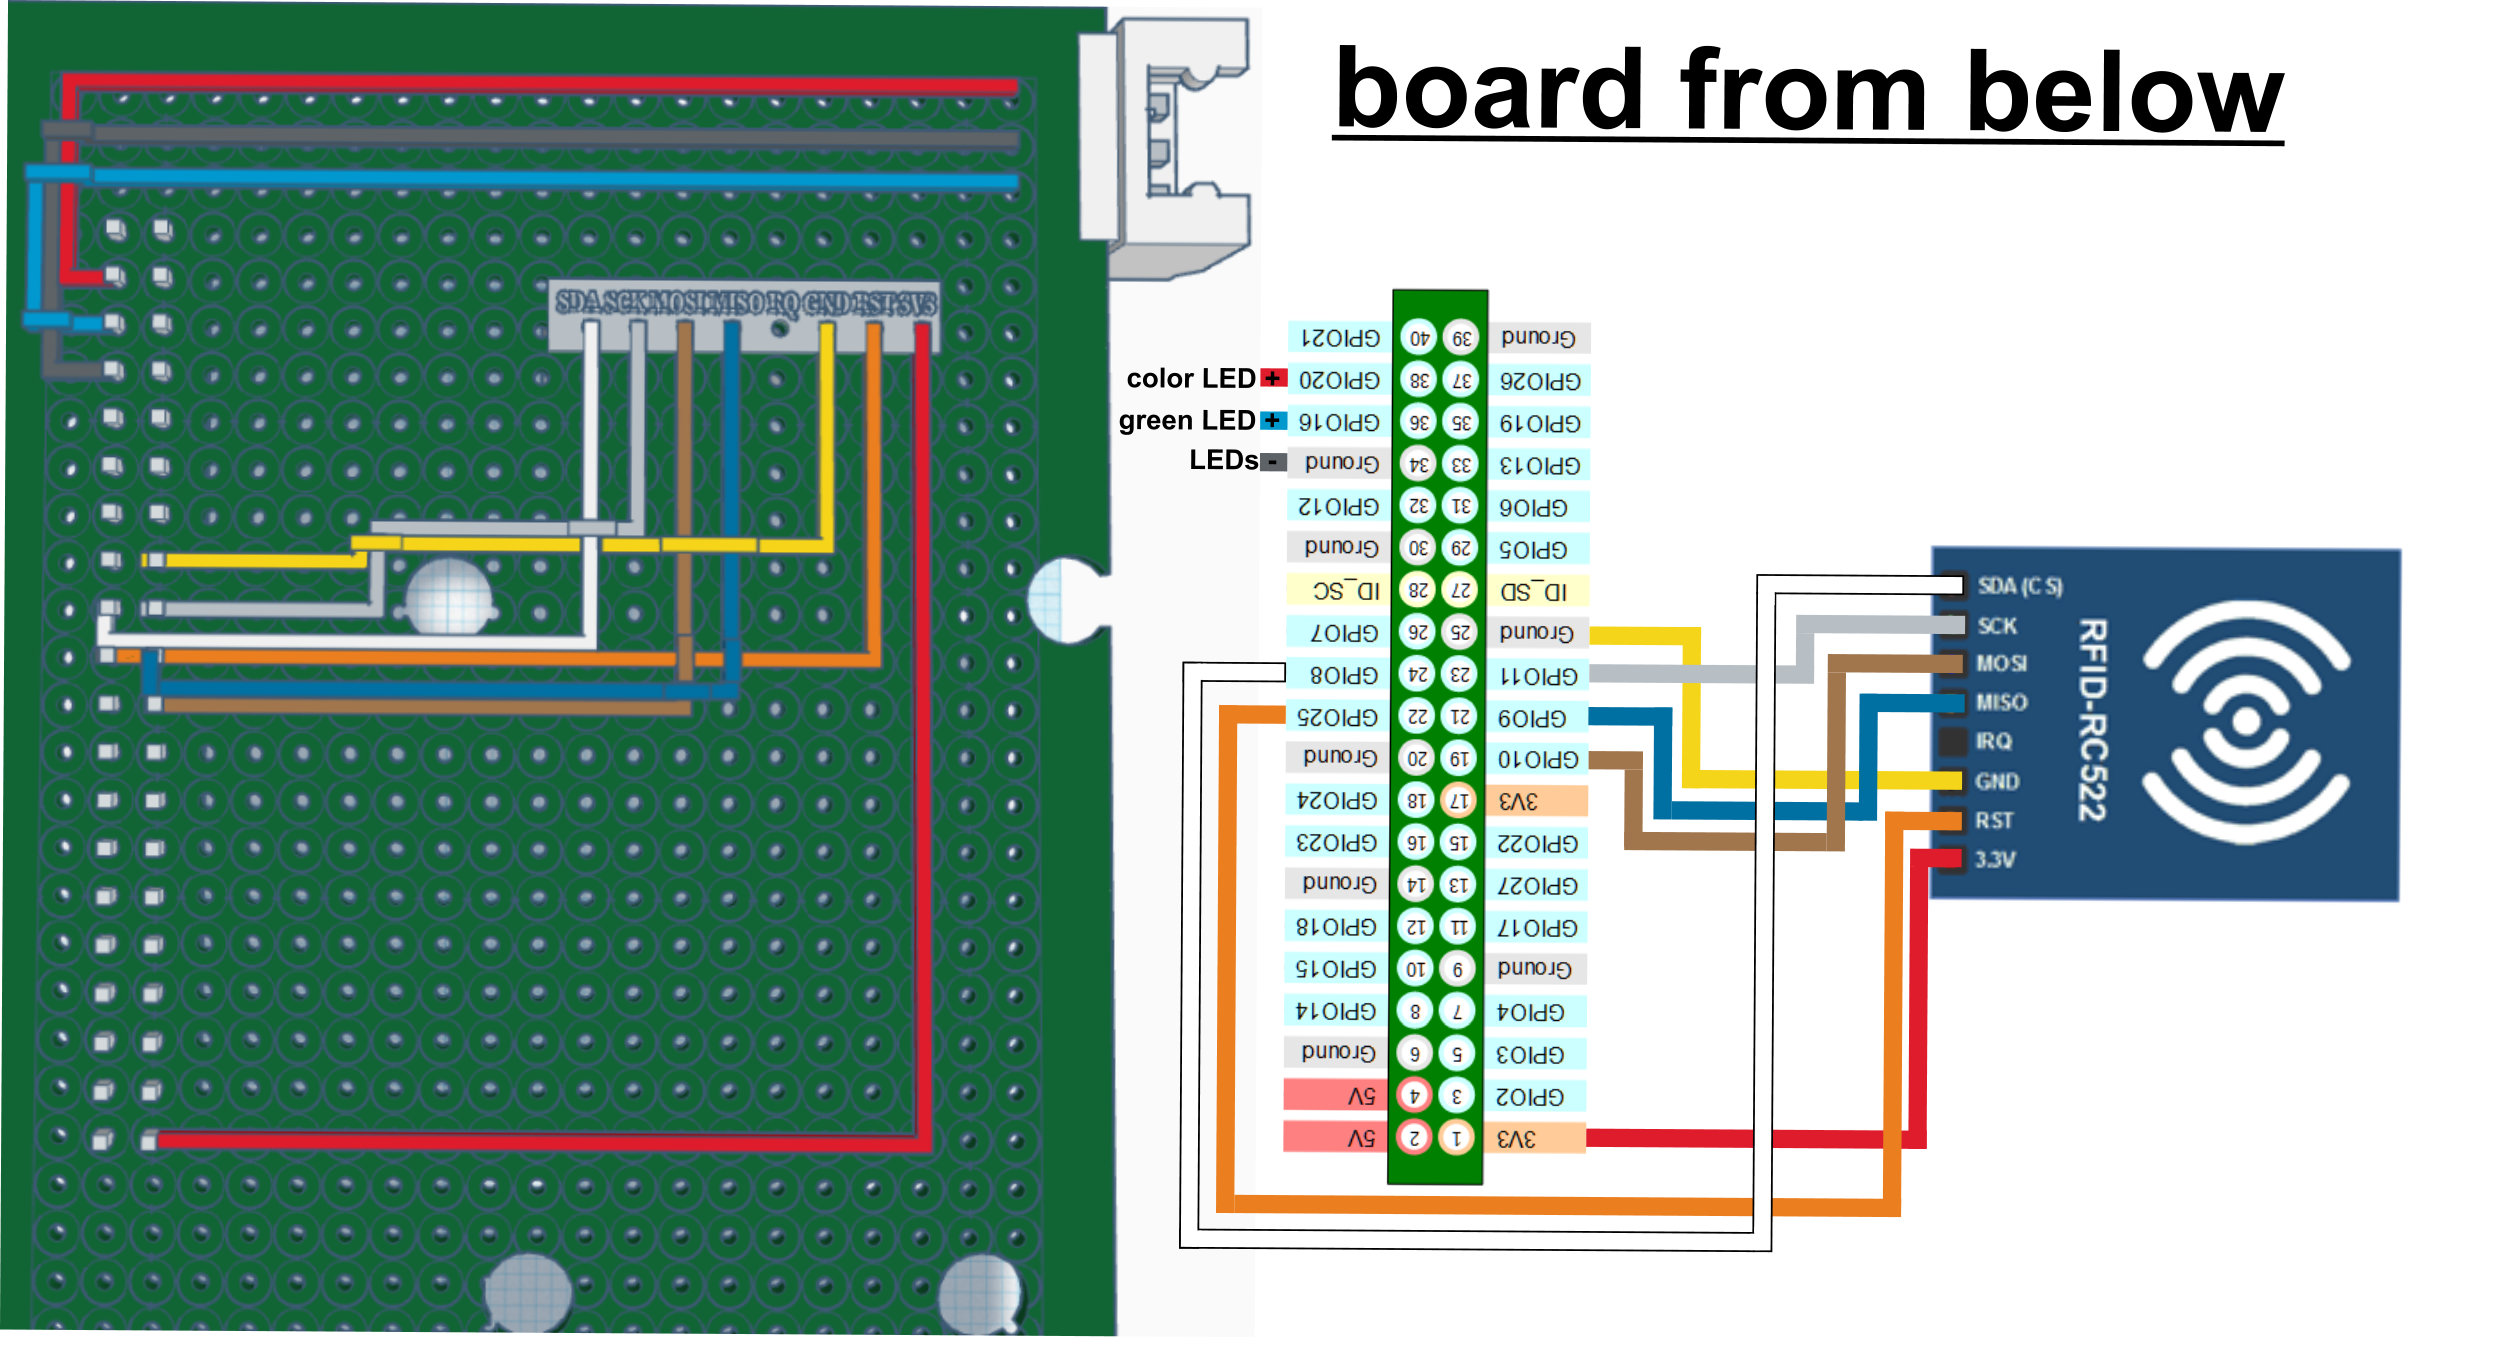
VidaBox is a jukebox that uses RFID chips to reference to a audio file and stream them.

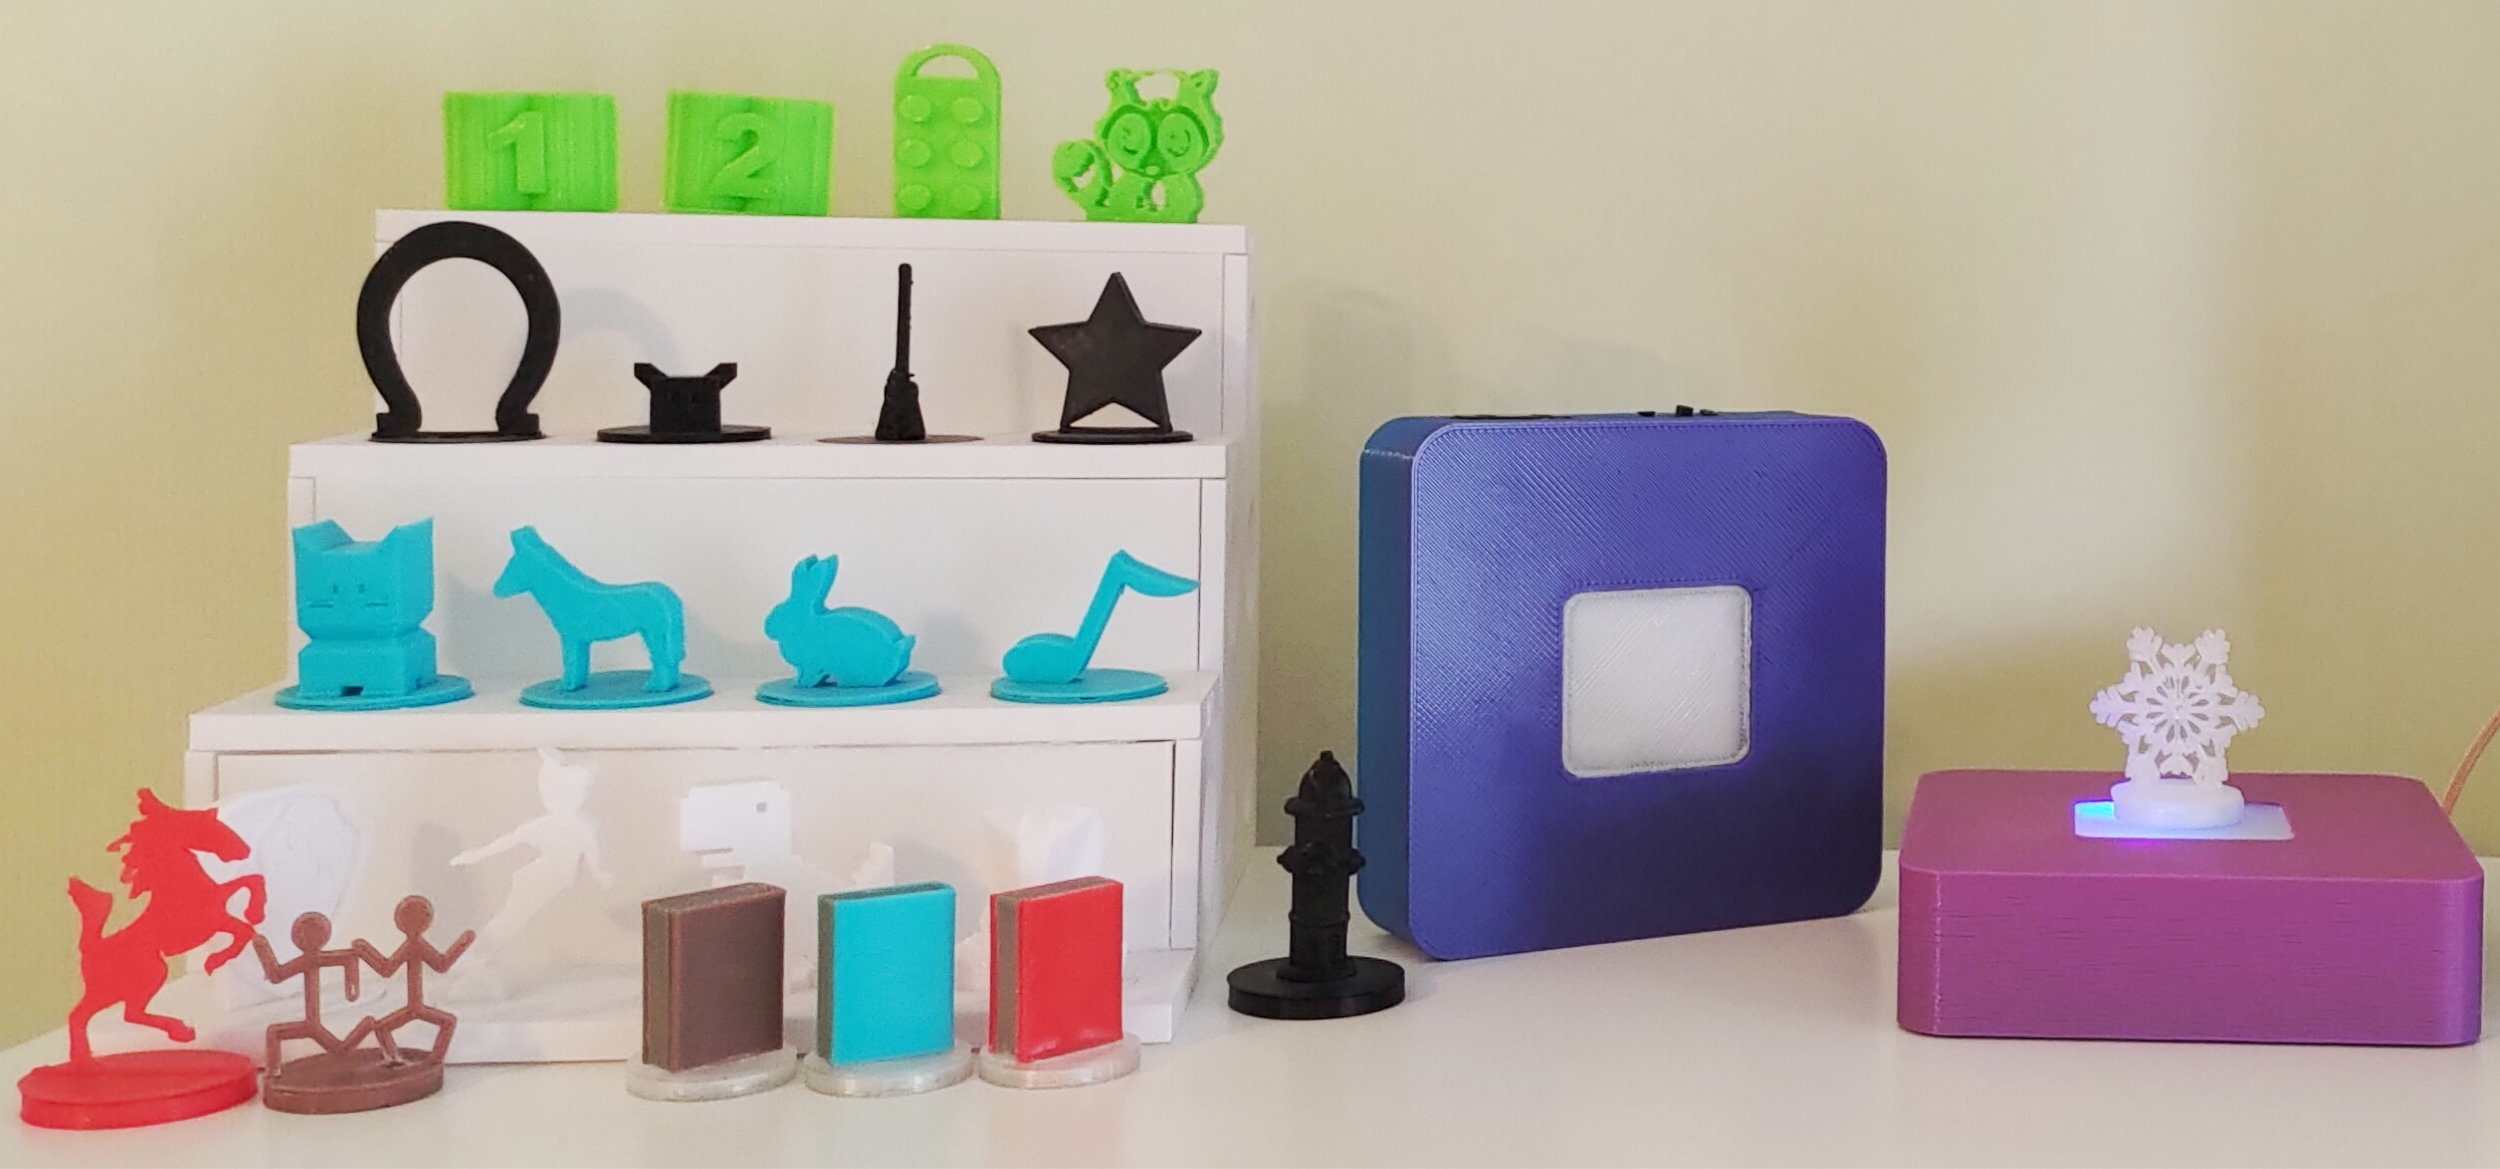
I build the jukebox for my 3 year old daughter named "Vida". She has tons of CDs (~ 60) that are spread all over the house. 80% of them are scratched and 20% are not working any more.

So the VidaBox is my solution for this problem. Every evening she loves to pick a figure to listen to a bed time story as every figure is referenced to a story. Now she cares about her figures having a place where they can "sleep". With the Web version of VidaBox I can show her any CD title in my browser from which she chooses one.
The VidaBox has several useful features, including a sleep timer. That way, the pi turns off automatically instead of bothering coming into her room and switching it off manually. I build a second one to make this guide for you and I also create a local version, that doesn't take up a website and server space. So everyone can use it for free. Nevertheless, the website simplifies the configuration and furthermore looks nice.

Now it's on you to build your own (child name)Box.

What do you need

  • Raspberry Pi Zero W
  • SD Card
  • RFID522
  • RFID Chip
  • Heatsink
  • 2x LED color
  • 2x LED green
  • USB Sound Card
  • 2x Mico USB plug
  • USB A Port
  • Micro USB Port
  • Switch (optional)
  • JST plug male/female
  • PCB Board
  • 40 Pin 2.54mm Female Pin Header
  • 40 Pin 2.54mm Male Pin
  • Cable
  • Screws
  • Shrinkable tubing

New Scripts:

  1. RFID522 (included in VidaBox)
  2. VidaBox local or Web

Edit Scripts:

  1. asound.conf
  2. .bashrc

Also need:

  1. Micro USB charger
  2. Aux Cable
  3. Amp filter or similar like a radio with aux in (optimal)

3D Printing parts:

  1. Box Case top ~19.87 m
  2. Box Case bottom ~7.58 m
  3. Figure panel ~4.69 m
  4. Figure ~1.32 m

In order to build the VidaBox a Raspberry Pi with an SD Card and having Debian installed is required. For the web version you also need a WiFi Connection. First of all, we build the VidaBox and connect all components. Therefor, check out the video to see how it is done and use it as an inspiration or build it like this.

Time Lapse - build the VidaBox

circuit diagram 3d prints Models

Set up the VidaBox

Connect the Raspberry Pi to your network, then update and upgrade it.

sudo apt-get update sudo apt-get upgrade

As this takes a while you have much time to do anything else, for example commenting this Video :)

Now you are ready to go. We have to check whether the Raspberry Pi recognizes the USB sound card:

aplay -l

In my case the USB sound card has the number 1

Now we can change the /etc/asound.conf script like this

                                        pcm.!default {
                                            type hw
                                            card 1
                                        }

                                        ctl.!default {
                                            type hw
                                            card 1
                                        }
                                        

Now we can clone the VidaBox scripts. You have 2 Options now, use the local version or the web Version of VidaBox.

git clone https://gitlab.com/Vida-Tec/vidabox_local

or

git clone https://gitlab.com/Vida-Tec/vidabox

VidaBox WEB

(WEB Login is required) Open the conf.TXT and type your login data in to this file.

{'name': 'demo', 'password': 'demo', 'version': '2'}

Go to vida-tec.de and set up your Vida-Box and configure your RFID Chip.

Read chip ID

Connect to the raspberry pi over ssh and go to the VidaBox directory and start ReadID.py

cd vidabox
python ReadID.py

or

cd vidabox_local
python ReadID.py

Hold your chip over the figure panel and copy the ID

VidaBox LOCAL

Open the setup.TXT and Set Up your settings for the VidaBox

cd vidabox_local
sudo nano setup.TXT
['/home/pi/vidabox_local/media/', 'my_Start-Up.mp3', '01:08', '1', '']

/home/pi/vidabox_local/media/

This is the path of your media directory. You can also type a path like https://myWebServer.com/media/

my_Start-Up.mp3

This is the name of the audio file that will play after boot, so you can hear if the VidaBox is ready

01:08

This is the sleep time, you can use a shutdown time. You can type --:-- to disable it

1

With this function you can control if the sound pauses when you remove the figure from the panel. 1 is ON and 0 is OFF


Upload your Audio files to the configured directory (/home/pi/vidabox_local/media/) and copy the name to the RFIDList.TXT

Open the RFIDList.TXT and type your RFID ID, figure name and your Audio file name into it

[
['8161DA52E83904', 'Figur', 'myAudioFile.mp3'],
['8161DA52626B04', 'Figur2', 'myAudioFile2.mp3']
]

To start the VidaBox after booting, we edit the .bashrc file

cd
sudo nano .bashrc

and paste the line sudo python vidabox_local/VidaBox.py at the bottom of this file

Now restart the VidaBox

sudo reboot